Follow Along...

Friday, February 25, 2011

BLOG HOP DAY 3 - Bundle of Joy

Hello OCL Blog Hoppers!  Have you enjoyed seeing the sneak peeks from the Design Team over the last couple of days?  Isn't this a great release?  I have thoroughly enjoyed working with the new sets!  Well, today's the day you get to find out what set I'm giving away as blog candy.  One of the girls wrote in her blog yesterday that the Bundle of Joy set was becoming her go-to set for baby cards and it has also become mine (as if you couldn't tell, ha!)...hopefully it will become yours as well since it's my blog candy!  Keep reading to find out how you could win this awesome set!


This is another great project using Bundle of Joy and yep, you guessed it...Shower the Baby.  *grin*  I absolutely LOVE these sets together!  Seriously now, what expecting mommy-to-be wouldn't be thrilled to receive a designer diaper bag and coordinating card???  The best part...it's also a gift card holder.  Do you see it there in the little pocket?  And check out that baby stroller...way too C-U-T-E!  It was stamped on Neenah, colored with Copic markers then cut out.  The wheels were stamped twice and popped up on Foam Squares.  Isn't the baby peeking out of the stroller precious?  That was me using my imagination; unfortunately, it isn't a stamp.  I made it by cutting a circle for the head, the ears then the little curl for the hair. 
It was colored with Copics and glued to the back.  And hey, don't forget about that ribbon...I was all thumbs when I put that on using Scor-Tape.  It took me FOREVER (ok...maybe not forever...but it sure seemed like it)!  Hmmm...what else?  The diaper bag was pretty easy to make.  I can post a tutorial of it later if anyone is interested.  It actually holds quite a bit.  I stuffed a Beanie Baby, a small blanket (it's underneath everything so you can't see it), a little book and three bibs.  The handles are attached with Scor-Tape and are actually pretty secure.  I'm really happy with the way it turned out.  If only I had someone to give it too!  The baby bottle card is a Sizzix die so it's really easy to assemble.

The rattle is from Bundle of Joy and the strip of ducks and the word "baby" is from Shower the Baby.  The rattle was cut out and popped up on Foam Squares.  I guess that's about it.

Copic coloring:

Stroller:  Y15, Y13, Y11, C4, C2  Baby:  R11, R00, E00, E000, 110 and a Copic Multiliner  Rattle:  B02, B01, B00, B000, Y38, Y13, C4, C3, C2, C1  Bottle top:  B02, B01, B00, B000, Y38, Y13, C4, C3, C2, C1  Outline:  110

Just a reminder, any comments you leave on my blog (and all of the other participating blogs) Wednesday, Thursday and today will count towards your chance to win blog candy.  To be eligible, please make sure that you include your contact information when you comment.  The contest will close on Saturday, February 26, at midnight.  Comment daily for more chances to win!

Check out all the cute stamps that come in this set!  Now go forth and get hopping!
 
Amber Hillman
Bev Gerard
Broni Holcombe
Deb Felts
Debbie Corbari
Denise Marzec
Heather McNally
Jeanne Streiff
Joy Stagg
Kendra Wietstock
Kisa Peters
Latrice Murphy
Melyssa Connolly
Michelle Fowler
Pam Hooten
Stephanie Serrano
Tammie Edgerton <== that's me!

Thanks for stopping by!


SUPPLIES
STAMPS:  OCL's Bundle of Joy, Shower the Baby
PAPER:  Neenah Solar White; Pat-a-Cake, Hickory Dickory and Twinkle Twinkle American Crafts
INK:  Memento Tuxedo Black
ACCESSORIES:  Copic markers; Copic Multiliner; Inkssentials Opaque White Gel Pen; Big Shot; Sizzix Card, Baby Bottle die; ScorPal; Scor-Tape; Foam Squares; Glue Dots; buttons, brads, ribbon and embroidery thread from my stash; Stamp-a-ma-jig; paper snips
SIZE OF FINISHED PROJECTS:  diaper bag = 8" wide x 3" deep x 8" high (including the handle); card = A2 (4 1/4" x 5 1/2")

Thursday, February 24, 2011

SNEAK PEEK DAY 2 - Shower of Blossoms

Hey there, I'm back with day 2 of the Our Craft Lounge Sneak Peeks.  Today I'm sharing my most favoritest (hmmm...is that even a word?) set in the whole release!  It's called Shower of Blossoms.

If you want to work on your coloring...this is the set for you!  I sat down to color these images and totally got in the zone and spaced everything out around me.  Don't let the detail freak you out though.  Illustrator, Marianne Walker, gives some awesome coloring tips for this image on her blog, I Like Markers.


Copic coloring:

Umbrella; BG99, BG96, BG93, E37, E35, E34  Bunnies:  RV21, RV00, W5, W4, W3, W2, W1, W0, W00, E31, C2, C1, 0  Flowers:  R01, R00, YG05, YG03  Bushes:  YG97, YG95, YG91, YG23, YG21, G82  Ground:  W5, W4, W3, W2, W0, W00, E31  Shadow:  C3, C2, C1, C0  Rocks:  W4, W3, W0, W00, E31  Sky:  B24, B23, B21, B000

OMGosh...this is only the second time that I've used the X-Press It Blending Card from Copic.  Wow...how can paper be so freakin' amazing!?!  I could color all day long on that stuff and my colors wouldn't bleed!  And blending???  Forget about it!  Seriously awesome paper!  I definitely need to get some more of that stuff!


Copic coloring:

Flowers:  R01, R00, R000, R0000, YG05, YG03  Pot:  BG99, BG96, BG93, R01, R00, R000, R0000, YG05, YG03  Bunnies:  RV21, RV00, W5, W4, W3, W2, W1, W0, W00, E31, C2, C1, 0  Ground:  W5, W4, W3, W2, W1, W0, E31, C00  Sky:  B24, B23, B21, B000


I wanted the image to be what stood out on these cards so I didn't do much with the layout.  Layers were cut from Basic Black, Fern and Neenah.  The Neenah layer was embossed and sponged with Blush Blossom.  To create the matting around the image, some of the layers were run through the Big Shot with a Nestie.  They were cut down the middle then adhered to each side of the image.  Rhinestones from my stash complete each of the cards.
Copic coloring:

Skin:  R00, E02, E01, E00, E000, E15, E13, E11  Hair:  N10, N8, N6, N4, N2, N0  Flowers:  R01, R00, R000, R0000, YG05, YG03  Clothes:  BG99, BG96, BG93, R01, R00, R000, R0000  Bunnies:  RV21, RV00, W5, W4, W3, W2, W1, W0, W00, E31, C2, C1, 0  Ground:  W5, W4, W3, W2, W1, W0, C00  Sky:  B24, B23, B21, B000

Okey-dokey...well, that's it for me today.  Make sure you leave a comment before you go!  The comments that you leave on my blog (and all of the participating blogs) yesterday, today and tomorrow will count towards your chance to win blog candy.  To be eligible, please make sure that you include your contact information when you comment.  The contest will close on Saturday, February 26, at midnight.  Comment daily for more chances to win!

Don't forget to stop by the rest of the Design Team's blogs to share a little love!  Here are the links...

Amber Hillman
Bev Gerard
Deb Felts
Denise Marzec
Heather McNally
Jeanne Streiff
Joy Stagg
Kendra Wietstock
Kisa Peters
Latrice Murphy
Lori McAree
Melyssa Connolly
Michelle Fowler
Pam Hooten
Stephanie Serrano
Tammie Edgerton <== That's me!


Thanks for stopping by!


SUPPLIES
STAMPS:  OCL's Shower of Blossoms
PAPER:  X-Press It Blending Card; Neenah Solar White; Bazzill Fern; SU Basic Black
INK:  Memento Tuxedo Black; SU Blush Blossom
ACCESSORIES:  Copic markers; Big Shot; Spellbinders Nestabilities Labels 8; Stylized Flowers Cuttlebug Embossing Folder; sponge; Sakura Clear Glaze Pen; rhinestones from my stash; adhesive; Glue Dots
SIZE OF FINISHED PROJECTS:  A2 (4 1/4" x 5 1/2")

Wednesday, February 23, 2011

SNEAK PEEK DAY 1 - Bundle of Joy (Part Deux)

Sorry for only showing one pic and none of the details in my post earlier!  Anyway, here goes...these baby shower invitations were made using two stamp sets from Our Craft Lounge...the new release set is called Bundle of Joy and the older set is called Shower the Baby.  They work nicely together, don't you think?  I made each of them into shower invitations but they could easily be made into thank you or even congratulation cards.


I've been admiring every one's dresser cards in the SCS gallery for a long time now.  I've always wanted to make one, but really didn't have a reason before now.  I really like the way it turned out!  It was pretty straight forward to make.  A piece of double sided DP was cut to 4 1/4" x 11" and scored across the center.  The top and bottom pieces were cut a hair wider than 4 1/4" (maybe 1/8" bigger...I can't remember exactly now).  The drawers were 1" x 3 3/4".  Check out my new EK Success border punch on the bottom!  Love it!  All of the blue pieces (back side of the DP) were lightly sponged with Marina Mist.  Mini brads were fastened for the knobs and the drawers were popped up on Foam Squares.

The "hanger" is actually the scroll from the border punch.  I was going to make one out of wire, but thought this might work for what I wanted...it did!  The onesie (one of my favs in this set) was colored with Copic Markers before OCL's Sparkly Fluff was glued to the heart and was popped up on a Foam Square to help keep it in place.  The blanket in the bottom drawer is just a scrap piece of ribbon that was adhered with Glue Dots.

The inside is all stamps from the Shower the Baby set.  I used a Stamp-a-ma-jig to line up the words.

Copic coloring:

Onesie:  B02, B01, B00, B000  Rattle (inside of card):  Y02, Y00, Y000, Y0000  Outline:  110


SUPPLIES
STAMPS:  OCL's Bundle of Joy, Shower the Baby
PAPER:  Neenah Solar White; Twinkle Twinkle American Crafts DP
INK:  Memento Tuxedo Black; SU Marina Mist
ACCESSORIES:  Copic markers; ScorPal; EK Success border punch; sponge; mini brads from Colorbok; Foam Squares; ribbon from my stash; paper snips; Sakura Quickie Glue Pen; OCL's Sugar Sparkly Fluff; Stamp-a-ma-jig
SIZE OF FINISHED PROJECT:  A2 (4 1/4" x 5 1/2")

My co-worker is throwing a baby shower for her step-daughter and she showed me the adorable invites she bought.  Of course I HAD to make one!  The store-bought one didn't have the diaper liner, the lacy bottom and there were slits in the card stock for the flaps.  I put my own spin on it and came up with this.  

The safety pins (from Bundle of Joy), were colored with Copic markers and cut out.  They were strategically popped up on the card front to hold the flaps into place then Glossy Accents were applied to give them a little added depth.  Check out the back side of the diaper!  Isn't it cute!?! 

Three strips of card stock were cut and a border punch was used to make the scallops...I was hoping it would resemble lace.  ***I was going to share the templates I created for the diaper and diaper liner...but I'm too tired to try to figure out how to link or attach a PDF to my blog.  If you're interested in receiving these templates, please request them through the comments.  If you leave your email address, I'll send them to you.***  UPDATE - I figured out how to link a PDF.  Here is the diaper template and the diaper liner template.  Please let me know if you have any problems downloading them.

The inside were all stamps from Shower the Baby.  The diaper liner was punched with the same border as the diaper bottom and adhered to the inside flap.


Copic coloring:

Safety pins:  YG95, YG93, YG91  Flower (inside of card):  RV42, RV32  Outline:  110


SUPPLIES
STAMPS:  OCL's Bundle of Joy, Shower the Baby
PAPER:  Neenah Solar White; Mary Quite Contrary American Crafts DP; Bazzill green (can't remember which off the top of my head)
INK:  Memento Tuxedo Black
ACCESSORIES:  Copic markers; ScorPal; paper snips; Glossy Accents; Foam Squares; SU border punch; Stamp-a-ma-jig
SIZE OF FINISHED PROJECT:  A2 (4 1/4" x 5 1/2")
  
Hang in there...we're almost done!  I found this onesie template online and tweaked it to make it more of what I wanted.  ***Again, I'm not sure how to attach or link a PDF to my blog so if you would like the tweaked onesie/bib template, please leave a request in the comments section with your email address and I'll send them to you.***  UPDATE - I figured out how to link a PDF.  Here is the onesie and bib template.  Please let me know if you have problems downloading it. The template was cut out on double-sided DP.  The bib was cut out with a Nestie then the neckline was hand cut . Holes were punched in the back and twine was used to tie the back.  The safety pin was made and attached as described above.  The duck is from Shower the Baby and was colored with Copic markers.  After it was colored, it was cut out and OCL's Sparkly Fluff was glued on to it then it was popped up on Foam Squares.


The inside of the card was all stamps from Shower the Baby.
Copic coloring:

Safety pin:  YG95, YG93, YG91  Duck:  Y15, Y13, Y11, Y38, YR04, YR01  Duck border (inside the card):  Y15, Y38  Outline:  110


SUPPLIES
STAMPS:  OCL's Bundle of Joy, Shower the Baby
PAPER:  Neenah Solar White; Hickory Dickory American Crafts DP; Bazzill green (I can't remember which)
INK:  Memento Tuxedo Black
ACCESSORIES:  Copic markers; ScorPal; paper snips; Big Shot; Spellbinders Nestabilities Standard Circles; Glossy Accents; Sakura Quickie Glue Pen; OCL's Lemon Drop Yellow Sparkly Fluff; Foam Squares; Lemondrop twine from The Twinery; Stamp-a-ma-jig
SIZE OF FINISHED PROJECT:  A2 (4 1/4" x 5 1/2")

Oh, before I forget, you can still leave comments on this post for a chance at the blog candy.  Here's the original post from this morning with the rules and a list of the other participating blogs that are also sharing peeks.

Thanks for stopping by (again)!  *wink*

SNEAK PEEK DAY 1 - Bundle of Joy

It's that time again over at Our Craft Lounge...Sneak Peeks and Blog Hop, baby!  I've been having fun playing with the new release (11 in all).  I can't wait to show you some of the projects I've been working on!  Today I'm sharing a set called Bundle of Joy.  It's an awesome baby set and I couldn't resist teaming it up with another OCL set called Shower the Baby.  This set is great for making any kind of invitation (it doesn't just have to be baby related).  These shower invitations were so much fun to make!  If anyone is interested in the specifics, I'll be back soon with lots of pics, details and possibly a template or two for download.


Ok, so here's the deal...be sure to leave a comment here and on all of the participating blogs today, tomorrow and also during the blog hop on Friday for a chance to win some blog candy.  To be eligible for a chance to win, please make sure that you include your contact information when you comment.  The contest will close on Saturday, February 26, at midnight.  Comment daily for more chances to win!

There's still plenty more to see so make the rounds and leave comments for all of the DT!

Amber Hillman
Broni Holcombe
Deb Felts
Denise Marzec
Heather McNally
Jeanne Streiff
Kendra Wietstock
Kisa Peters
Lori McAree
Melyssa Connolly
Michelle Fowler
Pam Hooten
Stephanie Serrano
Tammie Edgerton <==  That's me!

Thanks for stopping by!

Thursday, February 10, 2011

THANK YOU GIFT BOX

I think I mentioned before that I was trying my hand at teaching?  Well, I had my first class last month and I think it went alright.  I have another class coming up in a couple of weeks and this is what I came up with.  There are TONS of pics in this post so grab your favorite beverage, kick back and relax!

The thank you cards are 4" square, the lined envelopes are 4 1/4" square and the matching box is 4 1/2" square x 2" high.  I showed this project to a few of my friends and they all seemed to like it.  My fingers are crossed the class will too!

As soon as I saw the Growing Gratitude set from Our Craft Lounge, I immediately wanted to make a gift box with it.

Copic coloring:

Flower Pot:  BV01, BV00, BV000, BV0000  Flower:  R01, R00, R000  Leaves:  BG99, BG96, BG93  Shadow:  C4, C3, C2, C1  Sky:  B01, B00, B000, B0000

This stamp set is perfect for note cards!  All of the cards are exactly the same, inside and out, for the exception of the flowers.

You'll also find OCL's Whispy Patterns throughout the project.  It's a background set that has five different patterns.  I can't wait to use some of the other ones.  They have been out for a while, but they are new to me.  Love them both! 

Copic coloring:

Flower Pot:  BV01, BV00, BV000, BV0000  Flower:  T1, B93, B91  Leaves:  BG99, BG96, BG93  Shadow:  C4, C3, C2, C1  Sky:  B01, B00, B000, B0000

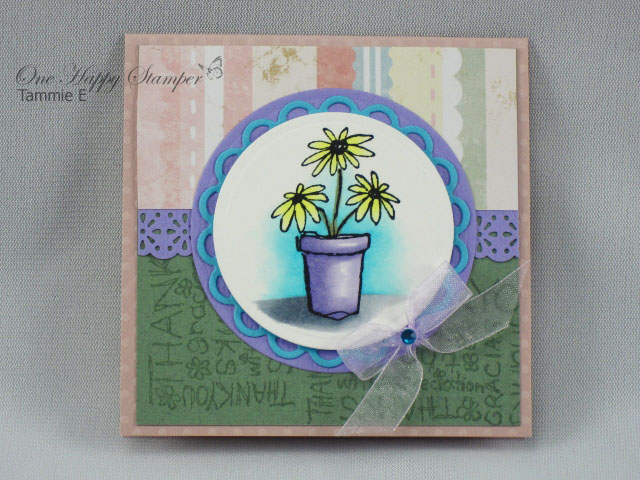
This project was made by stamping/masking the flowers and flower pots with Memento ink on Neenah that was cut using a Spellbinders die.  Then they were colored with Copic markers.  Two more layers were cut out of Bazzill card stocks with Spellbinders dies then adhered together.  The Neenah layer was popped up on Foam Squares.
Copic coloring:

Flower Pot:  BV01, BV00, BV000, BV0000  Flower:  Y00, Y000, Y0000  Stems:  BG93  Shadow:  C4, C3, C2, C1  Sky:  B01, B00, B000, B0000
All of the green background paper was made by stamping the background stamp with VersaMark Dazzle Champagne on Bazzill's Sage Classic card stock.  This was done throughout the project.  An EK Success border punch was used for the purple layer.  The layers were assembled and a bow with a rhinestone completes the card.
Copic coloring:

Flower Pot:  BV01, BV00, BV000, BV0000  Flower:  RV00, R000, R0000  Leaves:  BG99, BG96, BG93  Shadow:  C4, C3, C2, C1  Sky:  B01, B00, B000, B0000


The box is pretty basic to build.  It's an 8 1/2" square that is scored at 2" on all sides.  Cut four of the score lines until they intersect then cut a "V" to make it lay right when assembled.  The lid is 6 5/8" square scored at 1" on all sides.  It was assembled just like the box and decorated to match the note cards.  The exception was it uses the watering can instead of the flower pot.
Copic coloring:

Watering Can:  R01, R00, R000  Flower:  BV01, BV00, BV000  Leaves:  BG99, BG96, BG93  Shadow:  C4, C3, C2, C1  Sky:  B01, B00, B000, B0000


The inside of the cards and lined envelopes tie the whole project together.  The envelope template is from Valerie Stangle and the lined envelopes are by Gina K Designs.

Copic coloring:

Flowers:  BV00, Y00  Leaves:  BG93  Shadow:  C4, C3, C2, C1  Sky:  B01, B00, B000, B0000


This project includes the following challenges:

Craft Us Crazy ~ Anything Goes
Kaboodle Doodles Challenge ~ Break Out That Ribbon Stash
Paper Sundaes Challenge Blog ~ Two or more images
Pear Tree Designs ~ Free For All

Thanks for stopping by!


SUPPLIES
PAPER:  Neenah Solar White; Bazzill Sunset Rose Dotted Swiss, Sage Classic, Pixie Orange Peel, Tropical Breeze Smoothies; Melissa Frances Heart & Home Collectables Strong DP
INK:  Memento Tuxedo Black
ACCESSORIES:  Copic markers; Big Shot; Spellbinders Nestabilities Standard Circles Large, Standard Circles Small, Lacey Circles; VersaMark Dazzle Champagne; Stamp-a-ma-jig; sticky notes for masks; EK Success border punch; Creative Memories scalloped corner punch; foam squares; adhesive; ribbon from my stash; Kaisercraft rhinestones; Glue Dots; ScorPal; paper snips; typing paper
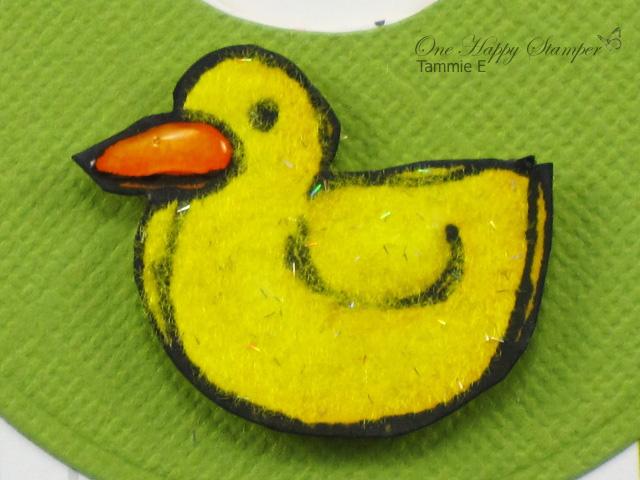
Tuesday, February 8, 2011

SWEET BABY

Hey there!  I'm back with an Our Craft Lounge challenge card.  This week's (OCL51) theme is a color challenge...pink, brown and white.  Well I definitely have that one covered!  Oh my, that pink is BRIGHT!  More so than I thought it would be, but I think it turned out ok anyway.

A long time ago I read how to "go out of the box" with Nesties and I finally tried it.  I will definitely do it again!  All you have to do is stamp your image, position your Nestie on top of it and put little pencil marks on the inside rim next to your stamped image.  Then cut on the lines until you reach your pencil marks.  When you're ready to run it through your Big Shot, pull the cut pieces to the outside of the die (part will be on the top and part on the bottom of your Nestie).  Run it through your machine and voila'...it cuts everything but your stamped image.  So very cool!

This whole card was made with Neenah card stock and colored with Copic markers.  That adorable little giraffe and sentiment is from OCL's Tree-mendous Love stamp set.  It's a great set because it doubles up as Valentine's Day AND baby!  What gives this card a little pizazz (besides that cutie pie on the front) is the Crafty Sparkles.  All of the dark pink on the giraffe is sparkly.  The baby bottle/card is a Sizzix die so it doesn't get any easier than that!  The twine is from The Twinery and the button is from my stash.  The heart is popped up on Foam Squares.  Guess that's it.  It was a very quick card today.

Copic coloring:

Giraffe:  RV04, RV02, RV00, RV000  Hearts:  E37, E35, E34, E33, E31, E30, RV04, RV02, RV00, RV000    Top of bottle:  RV04, RV02, RV00, RV000, E37, E35, E34, E33, E31, E30  Bottle:  E30

This card includes the following challenges:

The Lounge ~ Color (pink, brown and white)
Craft Your Passion ~ Anything Goes
Crafty Cardmakers ~ Hearts
OOLCB ~ For Someone Special
Stamptacular Sunday Challenge ~ Hearts Gone Wild!
The Crazy Challenge ~ Lots of Love

Thanks for stopping by!


SUPPLIES
STAMPS:  OCL's Tree-mendous Love
PAPER:  Neenah Solar White
INK:  Memento Tuxedo Black
ACCESSORIES:  Copic markers; Big Shot; Spellbinders Nestabilities Classic Heart, Classic Scalloped Heart; paper snips; OCL's Rose Pink Crafty Sparkles; Sakura Quickie Glue Pen; Atyou Spica Chocolate pen; The Twinery Pink Sorbet; button from my stash; Foam Squares
Related Posts Plugin for WordPress, Blogger...