Follow Along...

Friday, August 30, 2013

WELCOME FALL

Hey there, just popping in with a quickie fall card made with Taylored Expressions, A Bushel & A Peck, stamp set.  The image was stamped with Tuxedo Black then the background was colored with Copic markers.  I goofed around a little by spritzing some burlap with the Copic Colorless Blender (0) then pressing it to the colored sky to make a really cool pattern.  With the background complete, I went ahead and colored the rest of the image.  The Little Red Wagon is all about polka dots, so I couldn't resist playing along...and I love, love, love the super CAS layout from Freshly Made Sketches (I flipped it on it's side).  


COPIC COLORING: 
WHEELBARROW:  E44, E42, E40, C3, C1, C00  WHEEL:  C6, C4, C2, C0, C3, C1, C00  LEAVES:  YR18, YR15, YR12, YG95, YG93, YG91, YG03, G07, G03, G00  GROUND:  E44, E42, E40  BACKGROUND:  BG72, BG70, 0

Thanks for stopping by, have a great weekend! 


SUPPLIES: 
STAMPS:  TE A Bushel & A Peck
PAPER:  Neenah Solar White (aka Bazzill Coconut Swirl Smoothies); Bella Blvd Trick or Treat collection 
INK:  Copic markers; Memento Tuxedo Black 
ACCESSORIES:  Spellbinders Grand Calibur; TE Taylored Dies (Banner Stacklets 1); Mini Mister (filled with Copic 0);  burlap; Scrapbook Adhesives by 3L Thin Foam Squares; adhesive
SIZE OF FINISHED PROJECT:  A2 (4 1/4" x 5 1/2")

BLOG CANDY WINNER


Hey there, I would like to thank everyone for stopping by and leaving such sweet comments on my blog!  By random draw, the winner of my Blog Candy is...Paula H!


Congrats, Paula!  Please send me an email with your address and I'll get this out in the mail (after the holiday).

Have a safe, and wonderful, Labor Day weekend!


CELEBRATE...BLOG CANDY GIVEAWAY!

***This post will stay at the top of my blog until I draw a winner on August 30th***

If you're looking for my Taylored Expressions post, please CLICK HERE or scroll down.


Hey there, are you ready to celebrate with me?  It's hard to believe, but I've been blogging for three years now!  What better way to celebrate than to have a little blog candy giveaway that includes products from some of my favorite companies!  To be eligible to win, there are only a few rules you need to follow..."like" my page, One Happy Stamper, on Facebook, be a "follower" of my blog and leave me a comment on this post.  I'll draw the winner on August 30th.  Help me spread the word...feel free to re-post this pic on Facebook and/or your blog!


Happy "Bird" Day was stamped with Tuxedo Black onto Neenah card stock then colored with Copic markers.  The Taylored Expressions Pennant Border was die cut from My Mind's Eye paper.  The bird's beak and balloon both have Sakura Clear Glaze for a nice, subtle shine and a little Creative Impressions Black Twine completes the card.


COPIC COLORING: 
BIRD:  Y17, Y15, Y11, Y00  BEAK:  YR68, YR15, YR12  CAKE:  Y17, Y15, Y11, Y00  FROSTING:  E47, E44, E43, E42, E41  PLATE:  BG75, BG72, BG70  HAT:  BG75, BG72, BG70, Y17, Y15, Y11, Y00, YR68, YR15, YR12  BALLOON:  YR68, YR15, YR12  STREAMERS:  BG75, BG70, YR15  GROUND:  E44, E43, E42, E41  SKY:  BG75, BG70

I'm so glad you're celebrating my blogiversary with me...good luck in the drawing!

Thanks for stopping by! 


SUPPLIES: 
STAMPS:  WSD Happy "Bird" Day
PAPER:  Neenah Solar White; Bazzill Raven Monochromatic; My Mind's Eye Notable collection
INK:  Copic markers; Memento Tuxedo Black 
ACCESSORIES:  Spellbinders Grand Calibur; TE Pennant Border; Sakura Clear Glaze pen; Creative Impressions black twine; Zig 2-Way Glue pen; adhesive
SIZE OF FINISHED PROJECT:  A2 (4 1/4" x 5 1/2")

Saturday, August 24, 2013

HAPPY CAMPER

Hey there, hubby and I celebrate our 22nd wedding anniversary next weekend.  Since we'll be camping over the holiday, I thought Taylored Expressions S'more Fun would be an appropriate stamp set to use!


All of the papers from this card came out of the Key Ingredients Kit.  It sure took all the guess work out of finding things that match!  The trailer was stamped with Rich Cocoa onto the cream colored card stock in the kit and colored with Copic markers.  Since it was cream card stock, I struggled a little in matching the teal color from the background paper.  I kept adding more and more colors trying to figure it out, then decided to give up because honestly, my hubby won't notice if it doesn't match perfectly!  LOL!


COPIC COLORING: 
TRAILER:  BG18, BG57, G82, YG41, G40, BG10  DOOR, WINDOW FRAME, WHEEL:  YR18, YR15, YR12, YR02  WINDOWS:  BG10

Have a wonderful weekend and thanks for stopping by! 


SUPPLIES: 
STAMPS:  TE S'more Fun
PAPER:  TE August Key Ingredients Kit
INK:  Copic markers; Memento (Rich Cocoa, Potter's Clay)
ACCESSORIES:  Spellbinders Grand Calibur; TE Taylored Dies (Label Stacklets 4, Around the Campfire); ribbon from the August Key Ingredients Kit; Scrapbook Adhesives by 3L Thin 3D Foam Squares; Mini Glue Dots; adhesive
SIZE OF FINISHED PROJECT:  A2 (4 1/4" x 5 1/2")

Tuesday, August 20, 2013

TAYLORED EXPRESSIONS AUGUST STUDIO CHALLENGE


Hey there, it's time for the Taylored Expressions Baker's Dozen Studio Challenge (a monthly opportunity for the DT to share what makes our stamping studios hum...each month we're asked a fun, crafty question so we can share our favorite products, tips/tricks, stamping advice and more).

The question for August is:
The Sky's the Limit!  There are so many ways to create sky backgrounds for our cards and projects.  Often times, our blog readers are left staring at a beautiful sky and asking "How'd she do that?"
Show us one of your favorite ways to create a pretty sky background and make sure we know how to re-create it!

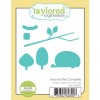
I've been trying my hand at airbrushing clouds lately, but airbrushing doesn't give you the softness of sponging.  A reusable, Cloud Border template (cut out of acetate) is my go to just about every time I sponge or airbrush clouds.  A little piece of blue painter's tape is used to keep it in place.  Love that stuff!


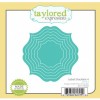
A circle Nestie was cut, embossed and sponged with Summer Sky while it was still in the die.  When I sponge, I start off my paper (in this case, on the cloud template) and work in circular motions.  I get a little heavier handed towards the cloud template and soften it more towards the layer above it.  My goal is a soft, gradient color.  Quick and easy!  


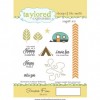
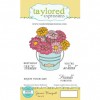
The image is called Zinnia Bouquet and isn't it amazing?  Seriously, so much fun to color!  To make a metal pail, I used my Toner Grays.  When I colored the handle orange, it was way too bright, so I used a couple of the Toner Grays on it too.  Did you know you could use Copic Ts over the top of other colors to tone down color and create a deeper shadow?  It's pretty awesome!  After the image was colored, it was fussy cut then popped up on foam.  The fun layout is this week's Sweet Sunday Sketch #191.


COPIC COLORING: 
FLOWERS:  RV17, RV14, RV13, Y17, Y15, Y11, Y00, RV69, RV66, RV63, YR68, YR15, YR12  STEMS:  YG23, YG21, YG00  PAIL:  T6, T4, T2, T0  HANDLE:  YR68, YR15, YR12, TR, T2

SUPPLIES: 
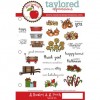
STAMPS:  TE Zinnia Bouquet
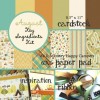
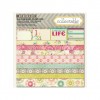
PAPER:  Neenah Solar White (aka Bazzill Coconut Swirl Smoothies); My Mind's Eye Memorable collection 
INK:  Copic markers; Memento (Tuxedo Black, Summer Sky)
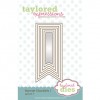
ACCESSORIES:  Spellbinders (Grand Calibur, Nestabilities Standard Circles Small); TE Taylored Dies (Banner Stacklets 1, Cloud Border); X-Acto knife; paper snips; sponge; KaiserCraft Silver rhinestones (colored with B23); Scrapbook Adhesives by 3L (3D Foam Squares, Thin 3D Foam Squares)
TECHNIQUE(S):   Fussy Cutting; sponging
SIZE OF FINISHED PROJECT:  A2 (4 1/4" x 5 1/2")


Time to see how the rest of the Baker's Dozen creates the fluffy stuff!


Thanks for stopping by! 


Friday, August 16, 2013

SEASON'S GREETINGS

Hey there, I'm going to be teaching some mini classes at a retreat this fall so I've been playing around with some ideas.  I love the Winter Wonderland stamp set from Taylored Expressions, so I came up with these cards using the Acrylic Block Technique.


No matter how many times you do this technique, no two cards will ever be the same!  Sticky note masks were torn from Post-it notes.  An acrylic block was inked up all over with Summer Sky then Danube Blue around the edges.  Pearl Glimmer Mist was spritzed onto the block until the ink was runny, then it was pressed onto the card stock.  


The masks were removed and the snowflakes from Winter Wonderland were stamped in both Summer Sky and Danube Blue.  The Glimmer Mist gives the cards a really subtle shimmer...LOVE!  A Stamp-a-ma-jig was used to stamp the sentiment in the corners.  KaiserCraft Silver rhinestones were colored with Copic B28 (did you know you could do that???) then placed into the centers of a few of the larger snowflakes.  

Thanks for stopping by! 


SUPPLIES: 
STAMPS:  TE Winter Wonderland
PAPER:  Neenah Solar White (aka Bazzill Coconut Swirl Smoothies); SU Brilliant Blue 
INK:  Memento (Summer Sky, Danube Blue)
ACCESSORIES:  Sticky note masks; acrylic block; Tattered Angels Pearl Glimmer Mist; Stamp-a-ma-jig; KaiserCraft Silver rhinestones (colored with B28); adhesive
TECHNIQUE(S):  Acrylic Block
SIZE OF FINISHED PROJECT:  A2 (4 1/4" x 5 1/2")

Tuesday, August 13, 2013

TAYLORED EXPRESSIONS AUGUST STAMP OF THE MONTH BLOG HOP

Hey there, it's time for Taylored Expressions August Stamp of the Month Blog Hop!  I absolutely HAD to have this set as soon as I saw it!  Our friends own a beautiful piece of land up the river, so we camp all summer long.  Hubby put in a "golf course" a couple years ago, so we always have something fun to do...golf, swimming, croquet, darts...or just sitting around the fire visiting...did I say eating?  Can't forget that!  *grin*  My step-brother usually brings my nieces up to the property 2-3 times during the summer.  They are adorable girls and a lot of fun to be with!  Their last trip to see us is usually for Labor Day, so I made this to give to the them.  They are CRAZY for s'mores!  In fact, they make "gourmet s'mores"!  I think out of all of their experiments, my favorite has been the Reese's Peanut Butter Cup S'mores!  *yum*


The stick and marshmallows were die cut then colored with Copic markers.  A circle Nestie was cut then sponged with Peanut Brittle before being removed from the die.  The marshmallows were glued to the stick then the stick was popped up on foam.  Love the papers in the Key Ingredients Kit...so much fun!  I like my marshmallows toasty, can you tell?  *snort*


COPIC COLORING: 
MARSHMALLOWS:  E44, E43, E41, 0  STICK:  E47, E44, E43, E41  LEAVES:  YG63, YG61, YG17, YG01

SUPPLIES: 
STAMPS:  TE S'more Fun (August SOTM)
PAPER:  Neenah Solar White (aka Bazzill Coconut Swirl Smoothies); SU Early Espresso; August Key Ingredients Kit
INK:  Copic markers; Memento Peanut Brittle
ACCESSORIES:  Spellbinders (Grand Calibur, Standard Circles Small, Standard Circles Large); TE Taylored Dies (Around the Campfire); sponge; Stamp-a-ma-jig; Scrapbook Adhesives by 3L Thin 3D Foam Squares; ribbon from the August Key Ingredients Kit; Mini Glue Dots; adhesive
TECHNIQUE(S):  Sponging
SIZE OF FINISHED PROJECT:  A2 (4 1/4" x 5 1/2")


Time to go hop with the Key Ingredients Team the the Baker's Dozen...have fun!


Tammie Edgerton - that's me!

Thanks for stopping by! 


Related Posts Plugin for WordPress, Blogger...